使用 React Hooks 的组件生命周期
React Hooks 提供了一个特殊的 Hook,即 useEffect(),用于在组件生命周期中执行特定功能。useEffect() 将 componentDidMount、componentDidUpdate 和 componentWillUnmount 生命周期方法合并为一个单一的 API。
useEffect() API 的签名如下 −
useEffect(
   <executeFn>,
   <values>
);
其中,
executeFn − 当 effect 发生时执行的函数,并带有可选的返回函数。该返回函数将在需要清理时执行(类似于 componentWillUnmount)。
values − effect 所依赖的值数组。React Hooks 仅在这些值发生变化时才执行 executeFn。这可以减少不必要的 executeFn 调用。
让我们在 react-clock-hook-app 应用中添加 useEffect() Hook。
在您喜欢的编辑器中打开 react-clock-hook-app。
接下来,打开 src/components/Clock.js 文件并开始编辑。
接下来,导入 useEffect API。
import React, { useState, useEffect } from 'react';
接下来,使用 setInterval 调用 useEffect,每秒设置一次日期和时间,并返回一个函数,使用 clearInterval 停止更新日期和时间。
useEffect(
   () => {
      let setTime = () => {
         console.log("setTime is called");
         setCurrentDateTime(new Date());
      }
      let interval = setInterval(setTime, 1000);
      return () => {
         clearInterval(interval);
      }
   },
   []
);
其中,
创建了一个函数 setTime,用于将当前时间设置到组件的状态中。
调用了 setInterval JavaScript API,每秒执行一次 setTime,并将 setInterval 的引用存储在 interval 变量中。
创建了一个返回函数,该函数调用 clearInterval API,通过传递 interval 引用来停止每秒执行 setTime。
现在,我们已经更新了 Clock 组件,组件的完整源代码如下 −
import React, { useState, useEffect } from 'react';

function Clock() {
   const [currentDateTime, setCurrentDateTime] = useState(new Date());
   useEffect(
      () => {
         let setTime = () => {
            console.log("setTime is called");
            setCurrentDateTime(new Date());
         }
         let interval = setInterval(setTime, 1000);
         return () => {
            clearInterval(interval);
         }
      },
      []
   );
   return (
      <div>
         <p>The current time is {currentDateTime.toString()}</p>
      </div>
   );
}
export default Clock;
接下来,打开 index.js,并使用 setTimeout 在 5 秒后从 DOM 中移除时钟。
import React from 'react';
import { createRoot } from 'react-dom/client';
import Clock from './components/Clock'


const container = document.getElementById('root');
const root = createRoot(container);
root.render(<Clock />);

setTimeout(() => {
   root.render(<div><p>Clock is removed from the DOM.</p></div>);
}, 5000);
接下来,使用 npm 命令启动应用。
npm start
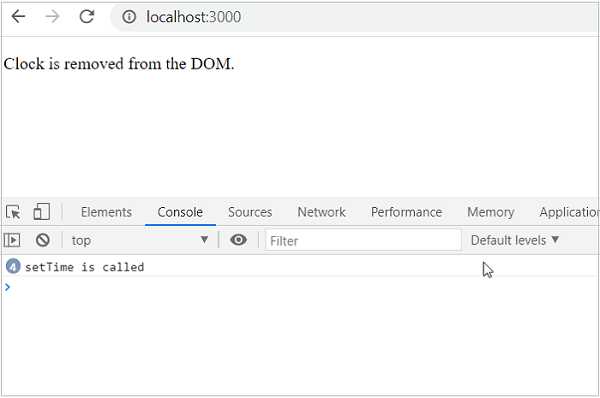
接下来,打开浏览器,在地址栏输入 http://localhost:3000 并按回车。
时钟将显示 5 秒,然后从 DOM 中移除。通过查看控制台日志,我们可以发现清理代码被正确执行。
React children 属性(又称 Containment)
React 允许在组件内部包含任意的子用户界面内容。可以通过 this.props.children 访问组件的子元素。在组件内部添加子元素称为 containment。Containment 用于组件的某些部分具有动态性质的情况。
例如,富文本消息框在被调用时可能还不知道其内容。在本章中,我们将创建一个 RichTextMessage 组件来展示 React children 属性的功能。
首先,使用 Create React App 或 Rollup bundler,按照 Creating a React application 章节的说明创建一个新的 React 应用 react-message-app。
接下来,在你喜欢的编辑器中打开该应用。
接下来,在应用根目录下创建 src 文件夹。
接下来,在 src 文件夹下创建 components 文件夹。
接下来,在 src/components 文件夹下创建一个文件 RichTextMessage.js,并开始编辑。
接下来,导入 React 库。
import React from 'react';
接下来,创建一个类 RichTextMessage,并使用 props 调用构造函数。
class RichTextMessage extends React.Component {
   constructor(props) {
      super(props);
   }
}
接下来,添加 render() 方法,并显示组件的用户界面及其子元素。
render() {
   return (
      <div>{this.props.children}</div>
   )
}
这里:
props.children 返回组件的子元素。
将子元素包装在 div 标签内。
最后,导出该组件。
export default RichTextMessage;
RichTextMessage 组件的完整源代码如下所示 −
import React from 'react';

class RichTextMessage extends React.Component {
   constructor(props) {
      super(props);
   }
   render() {
      return (
         <div>{this.props.children}</div>
      )
   }
}
export default RichTextMessage;
接下来,在 src 文件夹下创建一个文件 index.js,并使用 RichTextMessage 组件。
import React from 'react';
import { createRoot } from 'react-dom/client';
import RichTextMessage from './components/RichTextMessage'

const container = document.getElementById('root');
const root = createRoot(container);
root.render(
<RichTextMessage>
   <h1>Containment is really a cool feature.</h1>
</RichTextMessage>
);
最后,在根文件夹下创建一个 public 文件夹,并创建 index.html 文件。
<!DOCTYPE html>
<html lang="en">
   <head>
      <meta charset="utf-8">
      <title>React App</title>
   </head>
   <body>
      <div id="root"></div>
      <script type="text/JavaScript" src="./index.js"></script>
   </body>
</html>
接下来,使用 npm 命令启动应用。
npm start
接下来,打开浏览器,在地址栏输入 http://localhost:3000 并按回车。

浏览器会将组件的子元素包装在 div 标签中输出,如下所示 −
<div id="root">
   <div>
      <div>
         <h1>Containment is really a cool feature.</h1>
      </div>
   </div>
</div>
接下来,在 index.js 中更改 RichTextMessage 组件的子元素属性。
import React from 'react';
import { createRoot } from 'react-dom/client';
import RichTextMessage from './components/RichTextMessage'

const container = document.getElementById('root');
const root = createRoot(container);
root.render(
<RichTextMessage>
   <h1>Containment is really an excellent feature.</h1>
</RichTextMessage>
);
现在,浏览器会更新组件的子元素内容并输出如下所示 −
<div id="root">
    <div>
        <div>
            <h1>Containment is really an excellent feature.</h1>
        </div>
    </div>
</div>
简而言之,containment 是一个将任意用户界面内容传递给组件的优秀特性。