Angular - DatePicker
什么是 Datepicker?
datepicker 是一种用户界面组件,允许用户从类似日历的可视化表示中选择日期。它有一个输入字段,点击该字段会显示一个日历,用户可以在其中导航并选择特定日期。此 UI 组件有助于您在不手动输入的情况下获取准确的日期。
在预订和事件调度表单中,使用 datepicker 进行日期输入。在 Angular 中,您可以在 datepicker 中配置额外功能,例如日期范围和特定日期格式。
datepicker 看起来类似于带有日历图标的输入字段。当用户点击输入字段或日历图标时,会出现日历覆盖层。然后,用户可以导航月份和年份来选择所需的日期。一旦选择日期,它会填充输入字段,并关闭日历覆盖层。
在 Angular 中创建 Datepicker
为了创建 datepicker,我们将使用 Angular Material。它是由 Google 开发的一个 UI 组件库,遵循 Material Design 原则。它提供了一组丰富的可重用 UI 组件,例如按钮、表单和对话框。
Angular Material 具有内置的响应式设计特性,因此使用此库创建的网站会根据设备尺寸调整大小。此库专门为 Angular 应用程序构建。
要在 Angular 应用程序中使用 datepicker 组件,步骤如下 −
- 导入 MatDatepickerModule 和 MatNativeDateModule。
- 现在,将 <mat-datepicker> 元素添加到您的模板中,并将其绑定到输入字段。
示例 - DatePicker 的使用
在以下示例中,我们将展示如何在 Angular 应用程序中使用 datepicker。
步骤 1: 创建一个新的 Angular 项目。给项目取一个你喜欢的名字,我们将其命名为 datepicker-app。
ng new datepicker-app
步骤 2: 现在,使用以下命令导航到新创建的应用程序 −
cd datepicker-app
步骤 3: 使用以下命令将 Angular Material 添加到你的 datepicker-app 应用程序中 −
ng add @angular/material
在添加 Angular Material 时,CLI 将显示不同的配置选项。对于每个配置,选择默认选项。
步骤 4: 打开 app.html 并添加以下代码 −
app.html
<div>
  <h3>{{ title }}</h3>
  <mat-form-field appearance="fill">
  <mat-label>Choose a date</mat-label>
  <input matInput [matDatepicker]="picker" [(ngModel)]="selectedDate" />
  <mat-hint>MM/DD/YYYY</mat-hint>
  <mat-datepicker-toggle matIconSuffix [for]="picker"></mat-datepicker-toggle>
  <mat-datepicker #picker></mat-datepicker>
</mat-form-field>
<p *ngIf="selectedDate">Selected Date: {{ selectedDate | date }}</p>
</div>
<router-outlet />
其中,
- mat-form-field 定义表单字段的外观。
- matInput 创建带有 Material Design 样式的输入字段。
- [matDatepicker]="picker" 将输入字段与 mat-datepicker 组件绑定。
步骤 5: 打开 app.ts 并添加以下代码 −
app.ts
import { Component, ChangeDetectionStrategy } from '@angular/core';
import { RouterOutlet } from '@angular/router';
import { MatDatepickerModule } from '@angular/material/datepicker';
import { MatFormFieldModule } from '@angular/material/form-field';
import { MatInputModule } from '@angular/material/input';
import { CommonModule } from '@angular/common';
import { FormsModule } from '@angular/forms';
import {provideNativeDateAdapter} from '@angular/material/core';

@Component({
  selector: 'app-root',
  providers: [provideNativeDateAdapter()],
  imports: [RouterOutlet, MatDatepickerModule, MatFormFieldModule,
    MatInputModule, CommonModule, FormsModule],
  changeDetection: ChangeDetectionStrategy.OnPush,
  templateUrl: './app.html',
  styleUrl: './app.css'
})
export class App {
  title = 'Datepicker Application';
  selectedDate: Date | null = null;
}
步骤 6: 打开 app.css 并添加以下 CSS −
app.css
div {
    margin-top: 20px;
    display: flex;
    align-items: center;
    justify-content: center;
    flex-direction: column;
}
mat-form-field {
    width: 50%;
    margin-top: 20px;
    margin-bottom: 20px;
}
输出
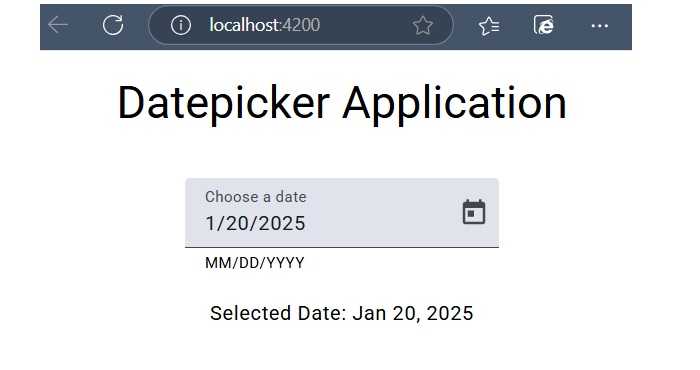
步骤 7: 现在,使用以下命令运行应用程序 −
ng serve
运行后,屏幕上将显示以下输出 −