Spring Tool Suite, STS
Spring Tool Suite, STS 是一个 IDE(集成开发环境),非常适合开发 Spring Boot 应用程序。
下载和安装 STS
可以从 https://spring.io/tools 下载 STS。
选择操作系统(本例为 Windows)。
下载 zip 文件并解压。
点击 SpringToolSuite4.exe 文件。
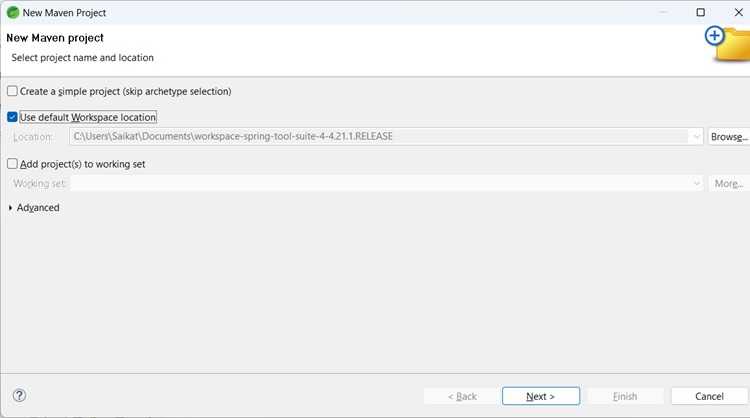
Spring Tool Suite 4 Launcher 对话框会询问 workspace 位置。输入位置,然后按 "Launch" 按钮。
在 STS 中创建简单的 Spring Boot 应用程序
转到 File -> New Maven Project。
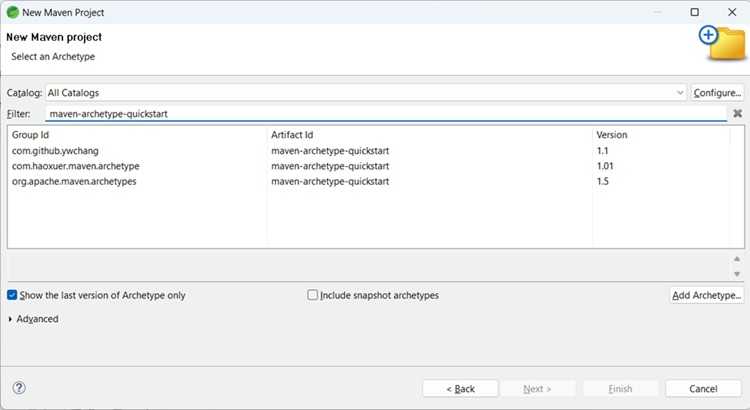
点击 Next。会出现以下对话框:
选择 maven-archetype-quickstart
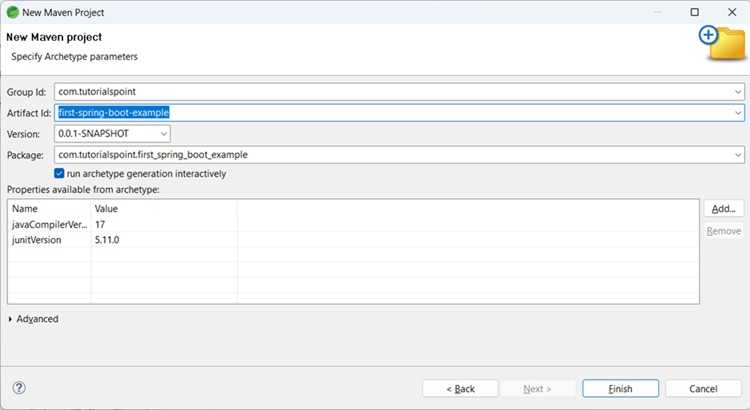
对于 GroupId,输入 com.,对于 ArtifactId 输入 first-spring-boot-example。
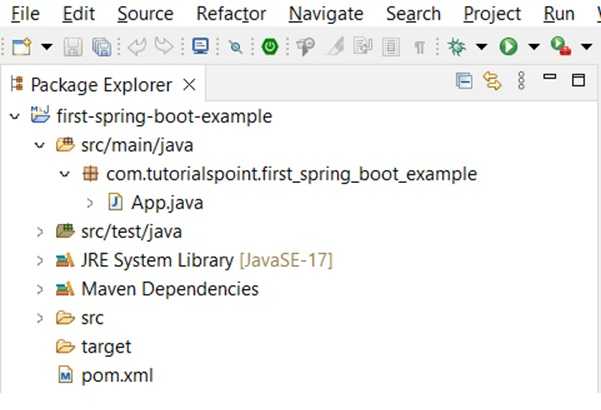
完成后,将创建以下文件夹结构 −
点击 Finish。
更新 pom.xml
打开 pom.xml 文件。在 dependencies 下添加以下内容。
<dependency>
   <groupId>org.springframework.boot</groupId>
   <artifactId>spring-boot-autoconfigure</artifactId>
   <version>3.3.3</version>
</dependency>
如果需要,可以通过右键点击 project -> Build path -> Add external archives 将 spring framework core jars 添加到 build path。
pom.xml
<project xmlns="http://maven.apache.org/POM/4.0.0"
   xmlns:xsi="http://www.w3.org/2001/XMLSchema-instance"
   xsi:schemaLocation="http://maven.apache.org/POM/4.0.0 https://maven.apache.org/xsd/maven-4.0.0.xsd">
   <modelVersion>4.0.0</modelVersion>
   <groupId>com.</groupId>
   <artifactId>first-spring-boot-example</artifactId>
   <version>0.0.1-SNAPSHOT</version>
   <dependencies>
      <dependency>
         <groupId>org.springframework.boot</groupId>
         <artifactId>spring-boot-autoconfigure</artifactId>
         <version>3.5.6</version>
      </dependency>
   </dependencies>
</project>
在 src/main/java 下创建一个新的 Java class,包名为 com..first_spring_boot_example。将类命名为 FirstSpringBootTestClass。
FirstSpringBootTest.java
package com..first_spring_boot_example;

import org.springframework.boot.SpringApplication;
import org.springframework.boot.autoconfigure.SpringBootApplication;

@SpringBootApplication
public class FirstSpringBootTest {

   public static void main(String[] args) {
      System.out.println("Hello World, this is First Spring Boot Test");
      SpringApplication.run(FirstSpringBootTest.class, args);
   }
}
输出
从 project explorer 右键点击文件 FirstSpringBootTest,然后选择 Run as -> Java application。在控制台中,你将看到 −
Hello World, this is First Spring Boot Test

  .   ____          _            __ _ _
 /\\ / ___'_ __ _ _(_)_ __  __ _ \ \ \ \
( ( )\___ | '_ | '_| | '_ \/ _` | \ \ \ \
 \\/  ___)| |_)| | | | | || (_| |  ) ) ) )
  '  |____| .__|_| |_|_| |_\__, | / / / /
 =========|_|==============|___/=/_/_/_/

 :: Spring Boot ::                (v3.5.6)

[2025-09-28 13:45:47.112] - 42364 INFO [main] --- com..first_spring_boot_example.FirstSpringBootTest: Starting FirstSpringBootTest using Java 21.0.6 with PID 42364 (D:\workspace\first-spring-boot-example\target\classes started by mahes in D:\workspace\first-spring-boot-example)
[2025-09-28 13:45:47.161] - 42364 INFO [main] --- com..first_spring_boot_example.FirstSpringBootTest: No active profile set, falling back to 1 default profile: "default"
[2025-09-28 13:45:47.830] - 42364 INFO [main] --- com..first_spring_boot_example.FirstSpringBootTest: Started FirstSpringBootTest in 1.212 seconds (process running for 1.476)