Android - 发送电子邮件
电子邮件是通过网络从一个系统用户以电子方式分发到一位或多位收件人的消息。
在开始电子邮件 Activity 之前,您必须了解使用 intent 的电子邮件功能。Intent 是将数据从应用程序内的 一个组件携带到另一个组件,或从应用程序外部携带数据。
要在您的应用程序中发送电子邮件,您无需从头实现一个电子邮件客户端,而是可以使用现有的电子邮件客户端,例如 Android 提供的默认 Email 应用、Gmail、Outlook、K-9 Mail 等。为此,我们需要编写一个 Activity,使用带有正确 action 和 data 的 implicit Intent 来启动电子邮件客户端。在本例中,我们将使用一个 Intent 对象从我们的应用中发送电子邮件,该对象会启动现有的电子邮件客户端。
以下部分解释了发送电子邮件所需的 Intent 对象不同部分。
Intent 对象 - 发送电子邮件的 Action
您将使用 ACTION_SEND action 来启动安装在 Android 设备上的电子邮件客户端。以下是使用 ACTION_SEND action 创建 intent 的简单语法。
Intent emailIntent = new Intent(Intent.ACTION_SEND);
Intent 对象 - 发送电子邮件的数据/类型
要发送电子邮件,您需要使用 setData() 方法指定 mailto: 作为 URI,并使用 setType() 方法将数据类型设置为 text/plain,如下所示 −
emailIntent.setData(Uri.parse("mailto:"));
emailIntent.setType("text/plain");
Intent 对象 - 发送电子邮件的 Extra
Android 内置支持添加 TO、SUBJECT、CC、TEXT 等字段,这些字段可以在将 intent 发送到目标电子邮件客户端之前附加到 intent 上。您可以在电子邮件中使用以下 extra 字段 −
| 序号 | Extra 数据 & 描述 |
|---|---|
| 1 |
EXTRA_BCC 一个 String[],包含应被密件抄送的电子邮件地址。 |
| 2 |
EXTRA_CC 一个 String[],包含应被抄送的电子邮件地址。 |
| 3 |
EXTRA_EMAIL 一个 String[],包含要投递到的电子邮件地址。 |
| 4 |
EXTRA_HTML_TEXT 与 Intent 关联的常量 String,与 ACTION_SEND 一起使用,作为 EXTRA_TEXT 的替代,提供 HTML 格式的文本。 |
| 5 |
EXTRA_SUBJECT 包含消息期望主题行的常量字符串。 |
| 6 |
EXTRA_TEXT 与 Intent 关联的常量 CharSequence,与 ACTION_SEND 一起使用,提供要发送的字面数据。 |
| 7 |
EXTRA_TITLE 与 ACTION_CHOOSER 一起使用时,提供给用户的 CharSequence 对话框标题。 |
以下示例展示了如何为您的 intent 分配 extra 数据 −
emailIntent.putExtra(Intent.EXTRA_EMAIL  , new String[]{"Recipient"});
emailIntent.putExtra(Intent.EXTRA_SUBJECT, "subject");
emailIntent.putExtra(Intent.EXTRA_TEXT   , "Message Body");
上述代码的输出如下图所示
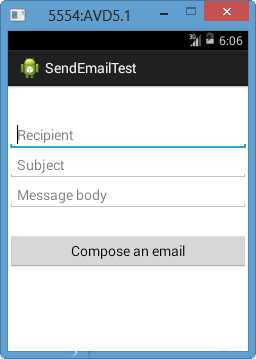
电子邮件示例
示例
以下示例将实际演示如何使用 Intent 对象启动电子邮件客户端,向指定的收件人发送电子邮件。
要实验此示例,您需要一台配备最新 Android OS 的实际移动设备,否则您可能会在模拟器上遇到问题,因为模拟器可能无法正常工作。其次,您需要在设备上安装电子邮件客户端,如 GMail(默认情况下每个 Android 版本都带有 Gmail 客户端应用)或 K9mail。
| 步骤 | 描述 |
|---|---|
| 1 | 您将使用 Android Studio 创建一个 Android 应用,并将其命名为 ,包名为 com.example.。 |
| 2 | 修改 src/MainActivity.java 文件并添加必要的代码来处理发送电子邮件。 |
| 3 | 修改布局 XML 文件 res/layout/activity_main.xml,如需要添加任何 GUI 组件。我添加了一个简单的按钮来启动电子邮件客户端。 |
| 4 | 修改 res/values/strings.xml 以定义所需的常量值 |
| 5 | 按照以下方式修改 AndroidManifest.xml |
| 6 | 运行应用以启动 Android 模拟器并验证应用中所做的更改结果。 |
以下是修改后的主活动文件 src/com.example./MainActivity.java 的内容。
package com.example.;

import android.net.Uri;
import android.os.Bundle;
import android.app.Activity;
import android.content.Intent;
import android.util.Log;
import android.view.Menu;
import android.view.View;
import android.widget.Button;
import android.widget.Toast;

public class MainActivity extends Activity {
   @Override
   protected void onCreate(Bundle savedInstanceState) {
      super.onCreate(savedInstanceState);
      setContentView(R.layout.activity_main);

      Button startBtn = (Button) findViewById(R.id.sendEmail);
      startBtn.setOnClickListener(new View.OnClickListener() {
         public void onClick(View view) {
            sendEmail();
         }
      });
   }

   protected void sendEmail() {
      Log.i("Send email", "");
      String[] TO = {""};
      String[] CC = {""};
      Intent emailIntent = new Intent(Intent.ACTION_SEND);

      emailIntent.setData(Uri.parse("mailto:"));
      emailIntent.setType("text/plain");
      emailIntent.putExtra(Intent.EXTRA_EMAIL, TO);
      emailIntent.putExtra(Intent.EXTRA_CC, CC);
      emailIntent.putExtra(Intent.EXTRA_SUBJECT, "Your subject");
      emailIntent.putExtra(Intent.EXTRA_TEXT, "Email message goes here");

      try {
         startActivity(Intent.createChooser(emailIntent, "Send mail..."));
         finish();
         Log.i("Finished sending email...", "");
      } catch (android.content.ActivityNotFoundException ex) {
         Toast.makeText(MainActivity.this, "There is no email client installed.", Toast.LENGTH_SHORT).show();
      }
   }
}
以下是 res/layout/activity_main.xml 文件的内容 −
这里 abc 表示 logo
<LinearLayout xmlns:android="http://schemas.android.com/apk/res/android"
   android:layout_width="fill_parent"
   android:layout_height="fill_parent"
   android:orientation="vertical" >

   <TextView
      android:id="@+id/textView1"
      android:layout_width="wrap_content"
      android:layout_height="wrap_content"
      android:text="Sending Mail Example"
      android:layout_alignParentTop="true"
      android:layout_centerHorizontal="true"
      android:textSize="30dp" />

   <TextView
      android:id="@+id/textView2"
      android:layout_width="wrap_content"
      android:layout_height="wrap_content"
      android:text=" "
      android:textColor="#ff87ff09"
      android:textSize="30dp"
      android:layout_above="@+id/imageButton"
      android:layout_alignRight="@+id/imageButton"
      android:layout_alignEnd="@+id/imageButton" />

   <ImageButton
      android:layout_width="wrap_content"
      android:layout_height="wrap_content"
      android:id="@+id/imageButton"
      android:src="@drawable/abc"
      android:layout_centerVertical="true"
      android:layout_centerHorizontal="true" />

   <Button
      android:id="@+id/sendEmail"
      android:layout_width="fill_parent"
      android:layout_height="wrap_content"
      android:text="@string/compose_email"/>

</LinearLayout>
以下是 res/values/strings.xml 的内容,用于定义两个新常量 −
<?xml version="1.0" encoding="utf-8"?>
<resources>
   <string name="app_name"></string>
   <string name="compose_email">Compose Email</string>
</resources>
以下是 AndroidManifest.xml 的默认内容 −
<?xml version="1.0" encoding="utf-8"?>
<manifest xmlns:android="http://schemas.android.com/apk/res/android"
   package="com.example." >

   <application
      android:allowBackup="true"
      android:icon="@drawable/ic_launcher"
      android:label="@string/app_name"
      android:theme="@style/AppTheme" >

      <activity
         android:name="com.example..MainActivity"
         android:label="@string/app_name" >

         <intent-filter>
            <action android:name="android.intent.action.MAIN" />
            <category android:name="android.intent.category.LAUNCHER" />
         </intent-filter>

      </activity>

   </application>
</manifest>
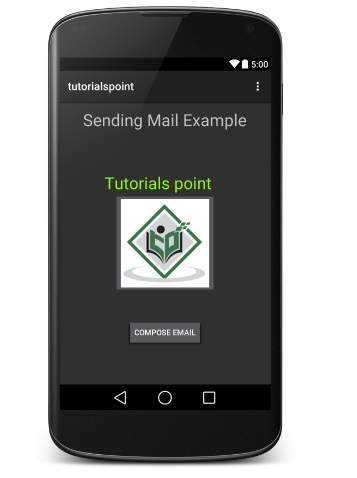
让我们尝试运行您的 应用。我假设您已将实际的 Android 移动设备连接到计算机。要从 Android Studio 运行应用,请打开项目的一个 activity 文件,然后点击工具栏中的 Run  图标。在启动应用之前,Android Studio 安装程序将显示以下窗口,让您选择要在哪里运行 Android 应用。选择您的移动设备作为选项,然后检查您的移动设备,它将显示以下屏幕 −
现在使用 Compose Email 按钮列出所有已安装的电子邮件客户端。从列表中,您可以选择一个电子邮件客户端来发送您的电子邮件。我将使用 Gmail 客户端发送电子邮件,它将包含所有提供的默认字段,如下所示。这里 From: 将是您为 Android 设备注册的默认电子邮件 ID。
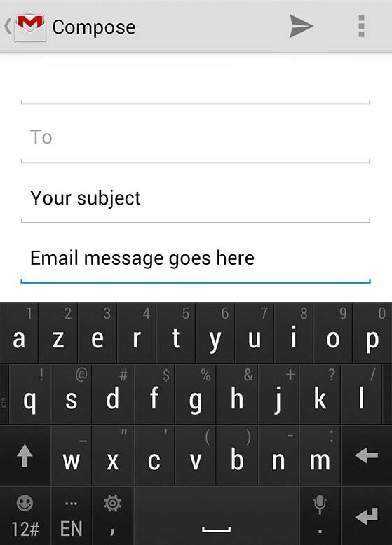
您可以修改任何给定的默认字段,并最终使用发送电子邮件按钮将电子邮件发送给指定的收件人。