Android - 电话呼叫
Android 提供了内置的电话呼叫应用,在某些情况下,我们可能需要在自己的应用中进行电话呼叫。这可以通过使用带有适当 action 的 implicit Intent 轻松实现。此外,我们可以使用 PhoneStateListener 和 TelephonyManager class 来监控设备上某些 telephony 状态的变化。
本章列出了创建用于拨打电话的应用的所有简单步骤。您可以使用 Android Intent 通过调用 Android 的内置电话呼叫功能来拨打电话。以下部分解释了进行呼叫所需的 Intent 对象不同部分。
Intent 对象 - 拨打电话的 Action
您将使用 ACTION_CALL action 来触发 Android 设备中可用的内置电话呼叫功能。以下是使用 ACTION_CALL action 创建 intent 的简单语法:
Intent phoneIntent = new Intent(Intent.ACTION_CALL);
您可以使用 ACTION_DIAL action 代替 ACTION_CALL,在这种情况下,您可以在拨打之前修改硬编码的电话号码,而不是直接拨打。
Intent 对象 - 拨打电话的数据/类型
要拨打号码 91-000-000-0000,您需要使用 setData() 方法指定 tel: 作为 URI,如下所示 −
phoneIntent.setData(Uri.parse("tel:91-000-000-0000"));
有趣的是,进行电话呼叫时,您无需指定任何额外数据或数据类型。
示例
以下示例将实际演示如何使用 Android Intent 拨打指定手机号码。
要实验此示例,您需要配备最新 Android OS 的实际移动设备,否则您将不得不使用模拟器,它可能无法正常工作。
| 步骤 | 描述 |
|---|---|
| 1 | 您将使用 Android Studio IDE 创建一个 Android 应用程序,并将其命名为 My Application,包名为 com.example.saira_000.myapplication。 |
| 2 | 修改 src/MainActivity.java 文件并添加必要的代码来处理拨打电话。 |
| 3 | 修改布局 XML 文件 res/layout/activity_main.xml,如需要添加任何 GUI 组件。我添加了一个简单的按钮来拨打 91-000-000-0000 号码。 |
| 4 | 无需定义默认字符串常量。Android Studio 会处理默认常量。 |
| 5 | 按照以下方式修改 AndroidManifest.xml。 |
| 6 | 运行应用程序以启动 Android 模拟器并验证应用程序更改的结果。 |
以下是修改后的主活动文件 src/MainActivity.java 的内容。
package com.example.saira_000.myapplication;

import android.Manifest;
import android.content.Intent;
import android.content.pm.PackageManager;
import android.net.Uri;
import android.os.Bundle;
import android.support.v4.app.ActivityCompat;
import android.support.v7.app.AppCompatActivity;
import android.view.View;
import android.widget.Button;

public class MainActivity extends AppCompatActivity {
   private Button button;

   @Override
   protected void onCreate(Bundle savedInstanceState) {
      super.onCreate(savedInstanceState);
      setContentView(R.layout.activity_main);
      button = (Button) findViewById(R.id.buttonCall);

      button.setOnClickListener(new View.OnClickListener() {
         public void onClick(View arg0) {
            Intent callIntent = new Intent(Intent.ACTION_CALL);
            callIntent.setData(Uri.parse("tel:0377778888"));

            if (ActivityCompat.checkSelfPermission(MainActivity.this,
               Manifest.permission.CALL_PHONE) != PackageManager.PERMISSION_GRANTED) {
                  return;
               }
               startActivity(callIntent);
         }
      });

   }
}
以下是 res/layout/activity_main.xml 文件的内容 −
<?xml version="1.0" encoding="utf-8"?>
<LinearLayout xmlns:android="http://schemas.android.com/apk/res/android"
   android:layout_width="fill_parent"
   android:layout_height="fill_parent"
   android:orientation="vertical" >

   <Button
      android:id="@+id/buttonCall"
      android:layout_width="wrap_content"
      android:layout_height="wrap_content"
      android:text="call 0377778888" />

</LinearLayout>
以下是 res/values/strings.xml 的内容,用于定义两个新常量 −
<?xml version="1.0" encoding="utf-8"?>
<resources>
   <string name="app_name">My Application</string>
</resources>
以下是 AndroidManifest.xml 的默认内容 −
<?xml version="1.0" encoding="utf-8"?>
<manifest xmlns:android="http://schemas.android.com/apk/res/android"
   package="com.example.saira_000.myapplication" >

   <uses-permission android:name="android.permission.CALL_PHONE" />

   <application
      android:allowBackup="true"
      android:icon="@drawable/ic_launcher"
      android:label="@string/app_name"
      android:theme="@style/AppTheme" >

      <activity
         android:name="com.example.saira_000.myapplication.MainActivity"
         android:label="@string/app_name" >

         <intent-filter>
            <action android:name="android.intent.action.MAIN" />
            <category android:name="android.intent.category.LAUNCHER" />
         </intent-filter>

      </activity>

   </application>
</manifest>
让我们尝试运行您的 My Application 应用程序。我假设您已将实际的 Android 移动设备连接到计算机。要从 Android Studio 运行应用,请打开项目的一个 activity 文件并点击工具栏中的运行  图标。选择您的移动设备作为选项,然后检查您的移动设备,它将显示以下屏幕 −
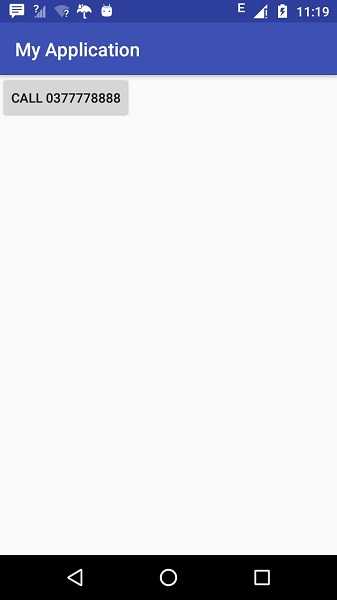
现在使用 拨打 按钮拨打电话,如以下所示 −